Dimension Appearance
Features of a Dimension
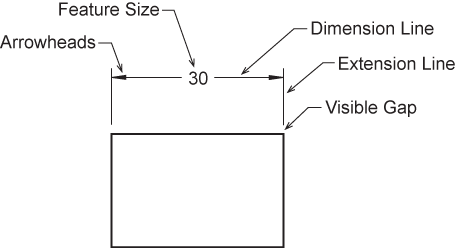
Dimensions use special lines, arrows, symbols and text. Dimensions make use of dimension lines, extension lines and leader lines. All three line types are drawn continuous and thin.

Leader Lines
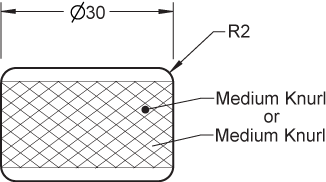
A leader line may be terminated in three different ways. Leader lines should be constructed such that there are ...
- no crossing leaders.
- no excessively long leaders.
- no leaders that are parallel to dimension or extension lines.
- no leaders that make a small angle with the surface to which it refers.

Arrowheads
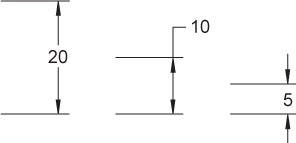
Arrowheads are drawn between the extension lines if possible. If space is limited, they may be drawn on the outside.

Types of Dimensions
Dimensions are given in the form of linear distances, angles, and notes.
Linear distances: They are usually arranged horizontally or vertically, but may also be aligned with a particular feature of the part.
Angles: Used to give the angle between two surfaces or features of a part.
Notes: Used to dimension diameters, radii, chamfers, threads, and other features that can not be dimensioned by the other two methods.
Lettering
Lettering should be legible, easy to read, and uniform throughout the drawing. Upper case letters should be used for all lettering unless a lower case is required. The minimum lettering height is 0.12 in (3 mm).
Dimension symbols
Dimensioning symbols replace text. The goal of using dimensioning symbols is to eliminate the need for language translation.
(NOTE: to view the symbols in the table, your browser must support the GDT font.)
| Type | Symbol |
|---|---|
| Diameter | n |
| Spherical Diameter | Sn |
| Radius | R |
| Spherical Radius | SR |
| Reference Dimension | (8) |
| Counterbore / Spotface | v |
| Countersink | w |
| Number of times or places | X |
| Depth / Deep | x |
| Dimension not to scale | 10 |
| Square (shape) | o |
| Arc length | |
| Conical taper | y |
| Slope | z |
| Symmetry | i |
